





A pain meter for tattoos is a comparison tool, not a prediction. Outer upper arms, outer thighs, and calves are often more manageable; ribs, sternum, armpits, hands, and feet tend to hurt more. Use the interactive figure below to compare broad body regions, then check the personal ratings and placement tips. There is no standardized 1-to-10 score for each body part.
Why I Built My Own Tattoo Pain Meter
When I booked my first forearm tattoo, every friend had a different horror story. Outer arm? “Barely a pinch.” Ribs? “Call your mom, you will cry.” I wanted something clearer than random anecdotes, so after twelve tattoos, three artists, and one memorable rib-cage dragon, I sketched a tattoo pain meter that rates each body zone from “cat scratch” to “yelp-out-loud.”
Below you’ll find the interactive meter, my own pain logs, and the practical tricks that saved me a few decibels of swearing. These are personal observations, not a promise that a particular spot will feel the same for you.
Try the Interactive Tattoo Pain Meter
How to use it: Hover, tap, or use your keyboard to select a region. The figure shows broad low, medium, and high pain categories, not medically measured ratings. The printed chart below covers more specific spots.
Hover, tap, or use Tab and Enter to check a body region.
Teal: lower discomfort. Orange: moderate. Red: higher discomfort. These are general patterns, not individual scores.
Why Some Spots Hurt More: A Quick Anatomy Lesson
- Sensitive nerve-rich areas: Fingers, armpits, and ankles can feel intense because of the nerves and delicate structures close to the surface.
- Bone proximity: Ribs, shins, and other bony spots have less cushioning. The tattoo needle works in the skin, not the bone, but the vibration and sting may feel sharper there.
- Skin and padding: Fleshier areas like the calf often feel more manageable than thin-skinned areas over bone. These are general tendencies, not guarantees.
- Movement and session length: Joints need careful positioning, and repeated passes or a long appointment can make any area feel more uncomfortable.
For a closer look at why these charts can disagree, read our guide to how accurate tattoo pain charts really are. This meter focuses on choosing a placement and planning for the appointment.
My Pain Log: Six Placements Ranked From “Chill” to “Oh No”
Here is how I ranked six placements, from breezy to brutal. Someone else might give these spots very different scores. The healing notes are recollections, not aftercare instructions or a timeline to follow.
| Placement | Pain Level (1-10) | What It Actually Felt Like | Healing Notes |
|---|---|---|---|
| Outer forearm | 3 | A curious cat licking sunburn | Mild swelling only |
| Calf | 4 | Rubber-band snap every few seconds | Day-one discomfort |
| Inner bicep | 6 | Hot pepper rubbed on skin | Bruised yellow for a week |
| Chest (over sternum) | 7 | Dentist drill on a cold tooth | Tender to sneeze for two weeks |
| Ribs | 9 | Mini jackhammer on bone | I tapped out twice for breaks |
| Ankle wrap-around | 10 | Bee stings that refuse to stop | Swelled like a loaf, slept with leg elevated |
Fresh tattoos can take weeks or longer to heal fully, even if the surface looks settled sooner. Avoid tight clothing or anything that rubs the area while it heals. For care guidance, see Cleveland Clinic’s tattoo aftercare advice.
Tattoo Pain Chart by Zone
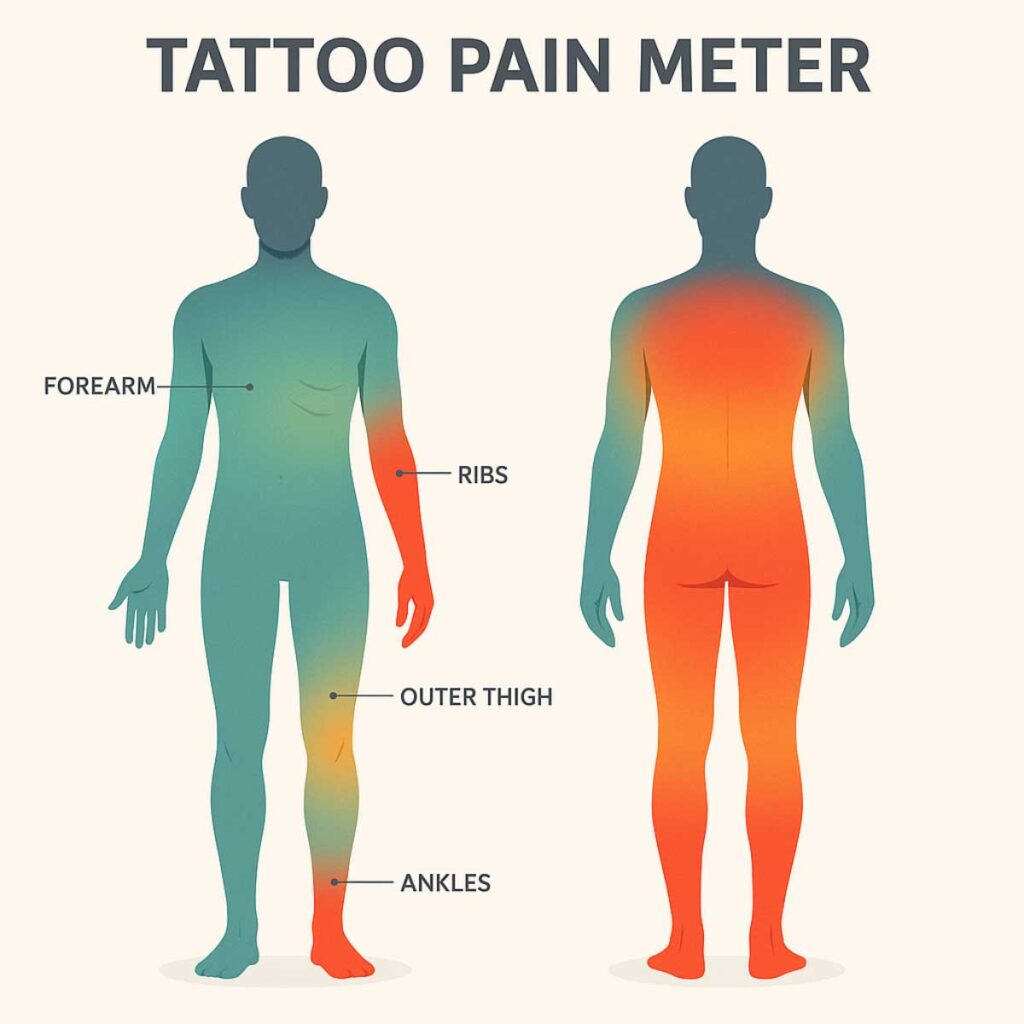
Key for the personal 1-to-10 scale:
Low = 1-3, Medium = 4-6, High = 7-10. These bands are descriptive, not clinical measurements.
1. Low-Pain Zones
- Outer shoulder and outer arm
- Forearm (top side)
- Outer thigh
Why I love them: These spots often offer more padding and a relatively comfortable surface to work on. Tattoo size and detail, not placement alone, determine how long a session takes.
2. Medium-Pain Zones
- Upper back and shoulder blades
- Stomach and hip
- Calf
- Front of thigh
Pro tip: Eating beforehand, breathing steadily, and having music ready can help make a medium-zone session feel more manageable. Check with your artist before wearing earbuds.
3. High-Pain Zones
- Ribs and sternum
- Ankles and tops of feet
- Inner arm, elbow ditch, armpit
- Fingers, palms, kneecap
My survival kit: Water, a snack for a longer appointment, and breaks agreed on with the artist. If you are considering tattoo numbing cream, read the safety notes below before using any product.
How to Make Your Tattoo Session More Manageable
- Eat and hydrate: My usual pre-session meal is oatmeal and a banana. Eat a normal meal, drink water, and bring a snack if your artist expects a long appointment.
- Choose a time when you feel rested: Morning can be a good option if you are usually fresher then, but your sleep and comfort matter more than a particular hour.
- Box breathing: Inhale four counts, hold four, exhale four, rest four; my smartwatch buzzes to keep rhythm.
- Be careful with numbing products: In my original pain log, even a lidocaine cream left my ankle discomfort at an 8 out of 10. That is an anecdote, not a recommendation about application time, dose, or safety. Ask your tattoo artist and a healthcare professional or pharmacist before using one.
- Work with your artist: Tell them when you need a pause, especially if you feel dizzy or faint. A good artist will explain what to expect and plan breaks with you.
Numbing cream safety: The FDA warns about certain pain-relief products marketed for tattooing, particularly high-strength lidocaine products and use over large areas, on irritated or broken skin, or under coverings that increase absorption. Serious reactions are possible. Never assume that a product sold as a tattoo numbing cream is safe for your appointment.
FAQs
Does size or placement affect pain more?
Both matter. Placement can change how intense the tattoo feels, while a larger piece or longer appointment may make even a relatively comfortable spot harder to sit through. The chart is a starting point, not a guarantee.
Can I take ibuprofen?
Check with a healthcare professional or pharmacist before taking or changing medication for a tattoo appointment. Ibuprofen can increase bleeding risk and may not be suitable for everyone. Do not stop prescribed medication without medical advice.
Will numbing sprays ruin the stencil?
That depends on the product and the artist’s process. Ask your artist first, and do not apply numbing sprays to broken or irritated skin without medical guidance. The FDA has warned about safety risks with certain products marketed for tattooing.
When Tattoo Pain Afterward Needs Attention
Some tenderness, redness, swelling, and later flaking can be part of normal healing. But pain that gets worse instead of better, spreading redness, pus, fever, or chills should prompt medical attention. The American Academy of Dermatology explains how to recognize concerning tattoo reactions. Follow your artist’s aftercare instructions, and don’t treat an infection warning sign as just another point on the pain meter.
Printable Tattoo Pain Cheat Sheet
The original printable tattoo pain chart and aftercare checklist are linked here:
Conclusion: Pain Fades, Ink Is Forever
Every tattoo tells a story, including how much you sweated in the chair. With this tattoo pain meter as a starting point, a sensible prep routine, and an artist you trust, even the red-zone spots may feel less intimidating. The pain is temporary, the art is a long-term decision, and taking a break is always allowed. Ink on, friends.